Appendix A and B
Appendix A: General Troubleshooting Tips
Everyone finds troubleshooting frustrating. Have patience, be attentive to details, and ask for help. You will have your coil performing beautifully in no time!
It’s impossible for us to cover every single failure scenario, and we’re not sure that a flowchart-style guide to a hundred different failure modes would even be that useful. Instead, follow these heuristic tips to chase down a bug.
- Visual inspection! We can’t stress enough that nothing beats manual hunting for incorrect components, wrong resistor values, or poor solder joints.
- Sometimes bad solder joints are invisible. Using a good soldering iron, reflow your joints and add a dab of fresh solder to shady connections. This alone fixes most of the problems that we encounter.
- The parts that most often break are logic ICs, not passives or power components. That’s why they’re socketed. If something dramatic happened to your coil, you will likely need to use a fresh set of silicon components.
- Inputs and outputs tell you a lot. Probably the most important troubleshooting technique is chasing signals through the circuit, datasheet in hand, until they vanish. When they vanish, that means one of two things: either the upstream IC producing the signal has failed, or the downstream IC receiving signal has a shorted input. The first step is to check around the pins for shorts. Barring that, try pulling the downstream IC. If that fixes the problem, simply replace the chip. Otherwise, the upstream IC needs replacement.
- The simplest solution is often the correct one. A non-working coil is probably the fault of a bad solder joint or IC, not because of some mysterious RF phenomenon, swollen capacitor, or voodoo curses.
Every problem has a cause!
Remember that every problem has a cause. Components are very rarely dead upon arrival. Blindly replacing chips can lead to a whole lot more dead chips if you don’t find the root cause!
How to ask for help
If you don’t find your answer in the manual, take a look at onetesla.com/forum.
If you don’t find your solution in threads that are already there, feel free to post about your issue. When posting to the forum, include as much information as possible about the symptoms you’re observing.
Appendix B: OMD converter

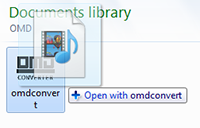
The OMD converter (omdconvert.exe) is a command-line program. Download it at onetesla.com/downloads. You can run it by either dragging a file with a .MID extension onto its icon, which will produce a file with the same name and extension .OMD, or by running it from the command line with omdconvert.exe .
omdconvert.exe is also WINE compatible. Users of Unix-like operating systems should be able to run the converter via WINE. The source is built on top of the Improv library and should compile on most modern C++ compilers.

