A step-by-step walkthrough showing how to put together the oneTeslaTS secondary and end caps
In this video, we walk you through how to assemble the secondary and end caps for the oneTeslaTS.
First, solder ring terminals to the leads at each end of the secondary coil. Use fine-grit sandpaper to sand the enamel off the wire. If the end of the wire breaks, gently unravel some more.
There are two endcaps: top and bottom. The bottom endcap is affixed to the resonator board, while the top one holds the toroid in place.
The endcaps have a specific assembly order. Included in your kit are two each of six different caps, labeled below.

| A. Start by gluing endcap 5 to 6. Do this for both sets, as this applies for both the bottom endcap and top endcap assemblies. | 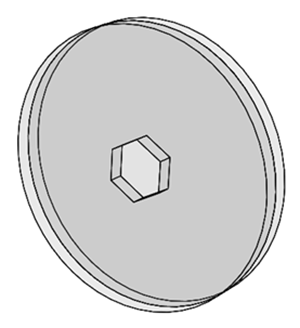 |
|
| B. We’ll then move onto the bottom endcap first. Assemble endcaps 2 and 3 by fastening them with the 15mm M3 screw and nuts. These two endcaps don’t need to be glued together. | 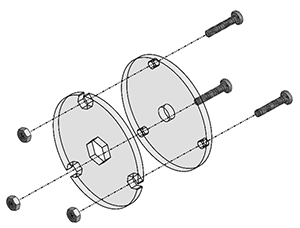 |
|
| C. Insert the M6 hex nut into the hex-shaped hole on endcap 2. Then, using the M6 nut and M3 screws for alignment, glue endcap 1 to endcap 2. | 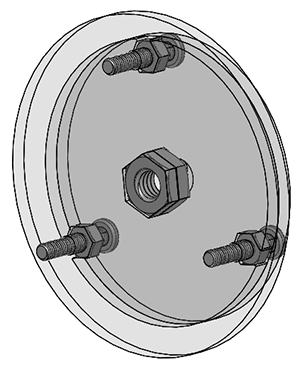 |
|
| D. Flip the assembly over. Glue endcap 4 to endcap 3. | 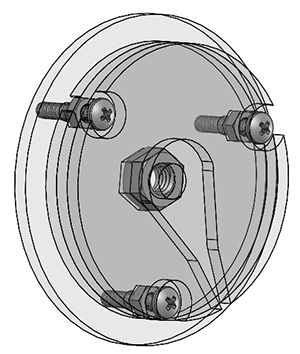 |
|
| E. Insert a ring terminal (with secondary wire already soldered) into the assembly, clamping it down with the M6 bolt. | 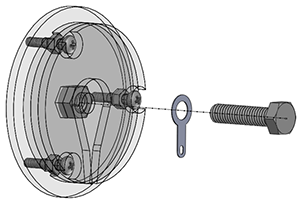 |
|
| F. Now, glue the endcap 5 and 6 assembly to endcap 4. | 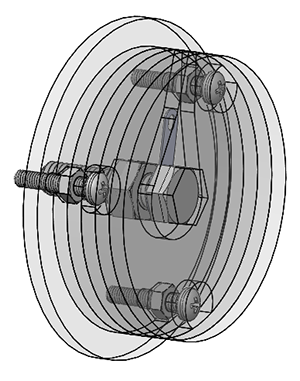 |
|
| G. Insert the endcap into the secondary, and glue it in place. Make sure to glue this well, as this glue joint holds up the coil when you pick it up by its secondary. |
You’ve now finished the bottom endcap! Good work! Now let’s move on to the top one.
For the top endcap assembly, the non-center holes aren’t used, so you don’t have to align them (don’t worry, the inner endcap assembly is not visible once the full secondary is assembled). The center holes still have to be aligned.
| H. Glue endcaps 1 and 2 together, using an M6 hex nut to correctly align them. | 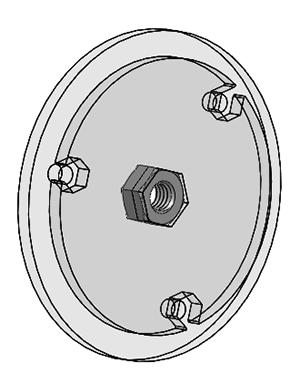 |
|
| I. Temporarily using an M6 bolt to align the center holes, glue endcap 3 to endcap 2. Remove the bolt once the glue is dry. | 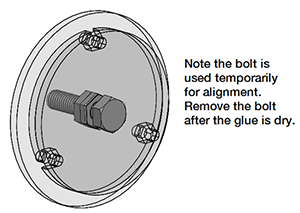 |
|
| J. Next, glue endcap 4 to endcap 3. |  |
|
| K. Insert a ring terminal (with secondary wire already soldered) into the assembly, clamping it down with the M6 bolt. |  |
|
| L. Now, glue on the endcap 5 and 6 assembly to endcap 4. | 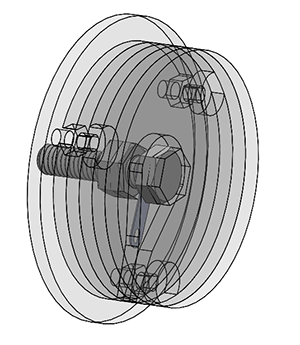 |
|
| M. Glue the top secondary endcap assembly in place on the secondary. If you’re wondering which glue to use, hot glue is great because it’s sturdy enough to hold the coil together, but if you make an error you can still force apart the pieces. If you prefer your coil to be more drop-proof, use super glue or epoxy. Note that super glue clouds acrylic, so use it sparingly!
|
||
| N. Using a multimeter, ensure that there is continuity between the bolts at either end. |
Note: If your 1000uF bus capacitors are tall (>45mm), one of the small bolts in the bottom endcap will colllide with them. If you have tall bus caps, simply OMIT one of the three bolts. As there are still three mounting points, mechanical stability will not be affected.
Broken wire?
If the wire breaks, simply peel off more wire from the top of the coil. Use a razor blade to separate out the top turn of wire.

