

How to Desolder
Table of Contents:
One of the most frustrating parts of building electronic circuits is getting something wrong. For a board that should take ten minutes to put together, you could spend an hour just trying to fix a component that you got backwards. Sadly, desoldering it’s not as easy as soldering in reverse.
For this tutorial I’m only going to be using a solder sucker and wick. There are more specialized desoldering tools out there like heat guns, and low melting-point solders, but you probably don’t have access to these unless you do specialized repair work for a living. And really the basic tools are all you need for most jobs.
A solder sucker, also called a desoldering pump, is a device that has a spring-loaded plunger, where when you push the button, the plunger springs back and pulls a vacuum inside the tube. The tip is made of teflon, which resists heat and won’t be damaged when you put the tip against molten solder.
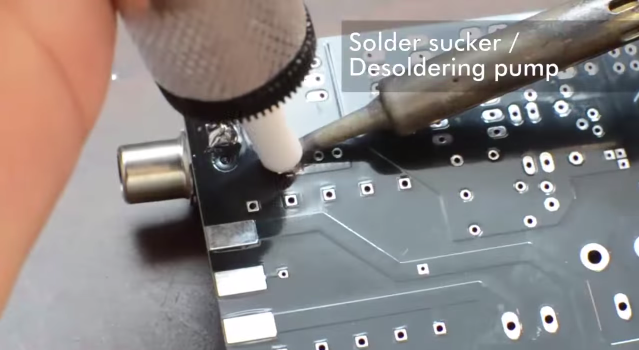
It requires a little bit of finesse to use. Put the tip of the pump over molten solder and push the button to suck up the solder. In my opinion, solder suckers are ideal for removing large quantities of solder, so they’re good to use first.
Solder Wick
Next we’ve got solder wick, or braid. This is a stand of finely woven copper wire coated in flux. Flux cleans the surfaces of hot metals and allows solder to wet to them. Be sure to always use a fresh piece of wick, because as soon as you heat it up, the flux burns away.
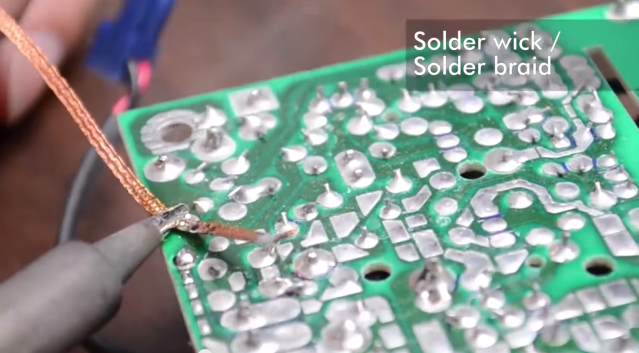
To use the solder wick, put the braid against the joint and put your iron on top of it. When the braid heats up sufficiently, it will wick up the solder by capillary action.

Heating and Pulling
The last trick is to heat all the pins of your component at the same time, while pulling it out. Multiple soldering irons, and multiple friends to help you out, are very useful at this point if you have a multi-pin device. This can take some creativity as you need to apply the iron to one side of the board, hold the board steady, and pull your device hard. Too stubborn to ask for help at first, I burned my fingers while filming this part, but I’m not going to show you that clip. The point is, it requires getting creative.
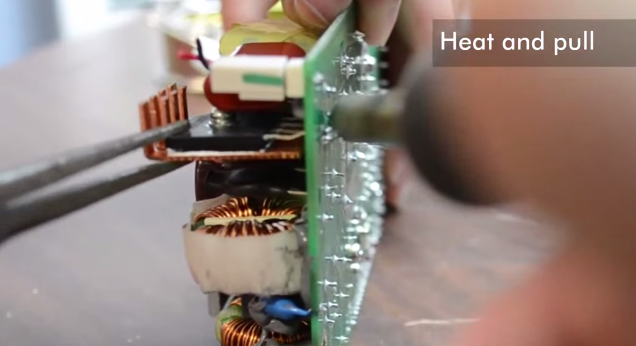
It can help to undo all of your hard work removing solder and put additional solder on the pads to ensure really good heat conduction, even when you’re holding the iron at funny angles.

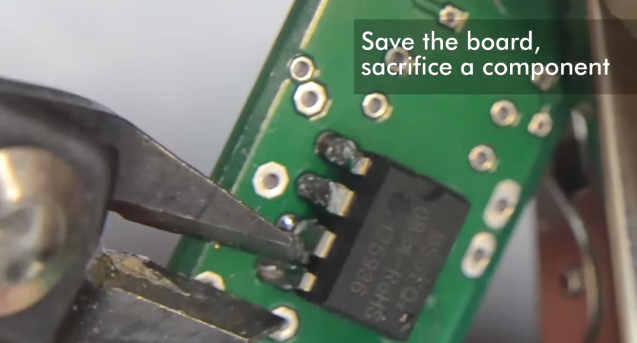
Sometimes, despite your best efforts, you just can’t get your part out. This is a point when you need to make a judgement call about what’s more valuable to you: the board or your part. If you’re desperate, you can save one at the expense of the other.
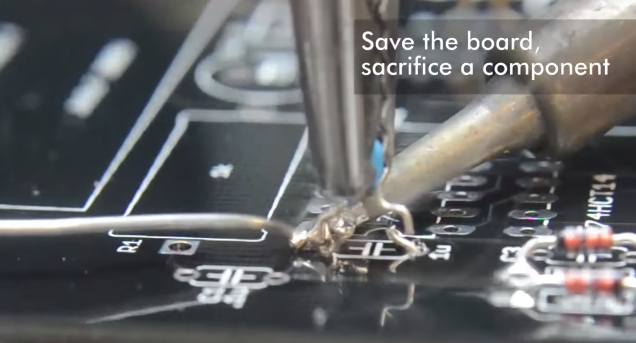
Saving the Board
Let’s say you want to save the board but don’t care about the component.
The first trick is just to cut out the component. You can clean up each hole by itself a lot more easily than all of them at once.
The second trick is to solder over the pads after you’ve cut out the components. This isn’t ideal, but sometimes it’s what you have to resort to. It’s possible to get broken leads stuck in really tight holes that are virtually impossible to remove, especially without professional equipment. In most cases this fix should be fine.
Saving the Component
Now let’s say you have an important component stuck in a board you’re willing to sacrifice. That’s right, take pliers to it. A dremel could work too, but be careful of fiberglass dust and wear a mask.
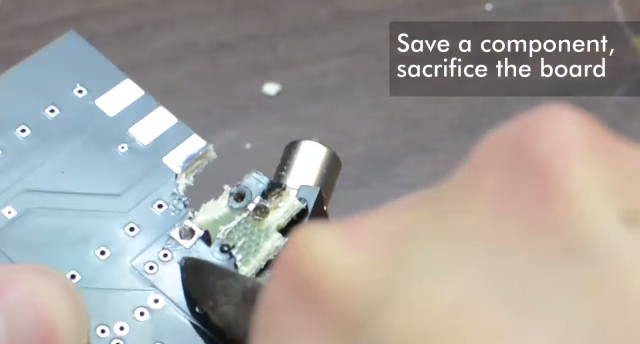
I’m not going to lie and tell you this is good practice, but sometimes desperate times call for desperate measures.