Step 13: Assemble the End Cap
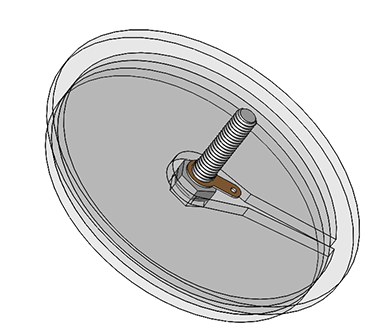
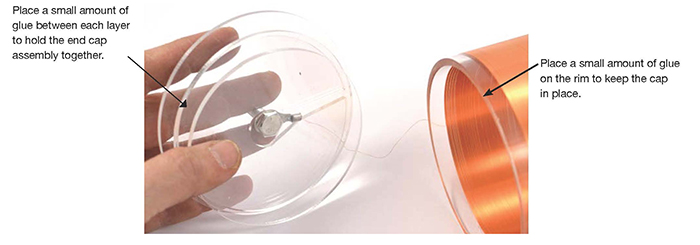
- A. Build the end cap for the secondary according to the diagram. Don’t worry if it’s not pretty—remember that with the toroid mounted, you don’t see the end cap! DO NOT glue down the bolt in the cap. The bolt should be a little loose because when you mount the toroid, the bolt will be pulled up against the ring terminal, creating a secure connection.
 |
 |
Which glue do I use?
Hot glue is great because it’s sturdy enough to hold the coil together, but if you make an error you can still force apart the pieces. If you prefer your coil more drop-proof, use super glue or epoxy. Note that super glue clouds acrylic, so use it sparingly!
- B. Glue the end cap in place on top of the secondary tube. Rotate your tube so that the secondary wire is taut and does not sag into the tube! Sagging wire acts like a breakout point inside the secondary and will cause internal arcing. If you want to be extra safe, you can insulate your exposed bit of wire with some hot glue.
- C. Check for continuity between the bolt and the bottom ring terminal to verify that the wire is still intact.
- D. Thoroughly remove any stray strings of hot glue inside the tube. Any stray bits inside the tube can result in internal arcing when you power up your coil later.

Broken wire?
If the wire breaks, simply peel off more wire from the top of the coil. Use a razor blade to separate out the top turn of wire.

