Step 2: Test the SD Interrupter
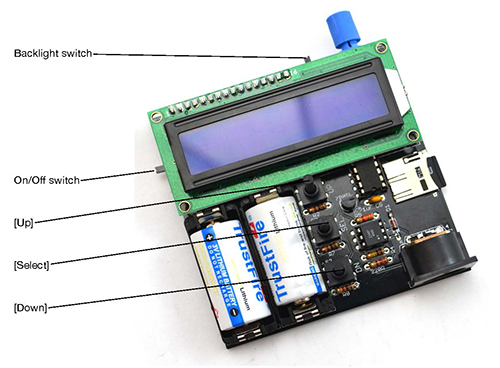
Power on the interrupter. Depending on whether or not you have a micro SD card installed, you should be greeted with either “Fixed Mode” or “No SD card found” on the display. Press [Down] until you see “Fixed Mode”, then press [Select] to launch fixed mode. Look into the optical transmitter and verify that you see a blinking red light. If you do, hooray, your interrupter works! Proceed to step 3.
|
If no display is present... |
|
|
If no backlight is present... |
Lack of a backlight indicates that the 5V rail is absent. Check for shorts on the board. Verify that the batteries are installed in the correct orientation.
|
|
If the display is present but the LED does not light... |
|
|
If the buttons don’t work... |
Check the soldering of the buttons and the 1K resistors next to them. Be gentle with the buttons, as they are tall and too much sideways force will damage them.
|
Testing that the basic interrupter functionality works will let you test your coil. If you want to do more advanced troubleshooting go to step 17.

Need help?
If you encounter a problem that isn’t covered here, take a look at our online help forum. Someone else may have had the same problem and figured out a solution.
Please post on the forum rather than emailing us for support, so that everyone can learn from how you resolved your problem!

